Blueberry Oat Muffins
Posted: October 22, 2012 Filed under: breakfast, snacks | Tags: blueberries, coconut sugar, muffin, oat flour, wheat flour Leave a comment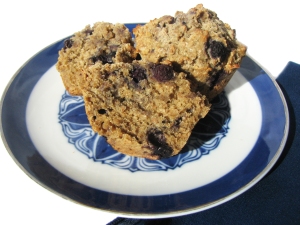 I’ve made and failed at more muffins than I would like to admit. It’s tougher than you think to make a healthy muffin that doesn’t have all purpose flour and tons of sugar in it. Most of my attempts tasted and looked a lot like a hockey puck. Then I finally found a couple recipes that I thought had potential and came up with my own version that I am happy to say my five year old daughter declared was “awesome!”.
The key to these muffins I believe is the 1:1 ratio of whole wheat flour and oat flour. These muffins have just the right amount of sweetness from a touch of honey and coconut sugar. Coconut sugar is a great substitute to refined white sugar. It is a low glycemic sugar that doesn’t lead to fluctuating blood sugar levels. It is becoming easier to find in grocery stores and I highly suggest checking it out.
You will see that I use vinegar in this recipe – don’t let that scare you off. When you add vinegar to milk it is like adding buttermilk to a recipe. This way you don’t buy a big carton of buttermilk when you only need 1/2 cup!
Makes 12 muffins
Ingredients
1 1/4 C Whole wheat flour
1 1/4 C Oat flour
1/4 C Coconut sugar
1 Tsp Baking powder
1/2 Tsp Baking soda
1/2 Tsp Cinnamon
1 C Unsweetened applesauce
1/2 C Milk
1/2 TBS White vinegar
2 TBS Honey (raw local honey is best)
2 TBS coconut oil, melted
1 large egg, beaten
1 C blueberries, tossed with 1/2 T flour
Preheat oven to 375 degrees. Line a 12 cup muffin pan with paper liners or rub the wells with coconut oil.
In a large bowl, combine the dry ingredients (whole wheat flour through cinnamon). In a medium bowl, combine the wet ingredients (applesauce through the egg). Pour the wet ingredients into the dry ingredients. Stir until just combined. Carefully fold in the blueberries. This batter should be filled nearly to the top of the cup. They won’t rise as much as traditional muffins do.
bake for 18 minutes or until a toothpick inserted into the center comes out clean and the top gets lightly golden brown.
Mock Tuna Salad Sandwich
Posted: October 1, 2012 Filed under: dinner, lunch, sandwiches, snacks | Tags: baby spinach, chickpeas, tomato Leave a comment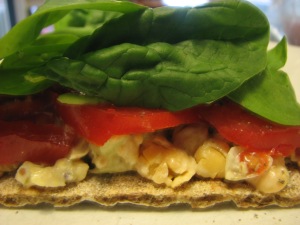 As a vegetarian, there are a few staple sources of protein that I work into my daily diet. A typical day may include some kind of nut butter, beans, lentils, quinoa or chickpeas (just to name a few!). This recipe was born when I wanted to try and find a way to use up a half can of chickpeas that I had opened a few days earlier. I wrote the recipe for a whole can of chickpeas, but you can easily halve the recipe like I did today. I am not a big fan of relish (which was an ingredient in most of the recipes I found online), so I decided to add capers. I love the briny quality of capers and I found that they added a really nice flavor. I also adore whole grain mustard so I knew that had to be added as well. With the crunch of the celery and freshness of the scallions, I think this is a great vegetarian lunch.
Serves 3-4
Ingredients
1 15 oz Can of chickpeas, mashed
2 Tbs Mayonaise (I prefer one with an olive oil base OR Vegenaise would work well too)
3 Tsp Whole grain dijon mustard
3Tsp Capers, finely chopped
2 Tbs Scallions, chopped finely
2 Celery stalks, finely diced
Salt and pepper to taste
Combine chickpeas through celery in a medium size bowl. Add a few grinds of freshly ground pepper. Taste to determine if it needs a pinch more salt.
Serving suggestion: Serve open faced on Rye Wasa crackers or your choice of toasted bread, topping with sliced tomato and baby spinach.
Fruit and nut breakfast cookies
Posted: September 27, 2012 Filed under: breakfast, snacks | Tags: banana, coconut, dried fruit, oats, sunflower seeds, walnuts Leave a comment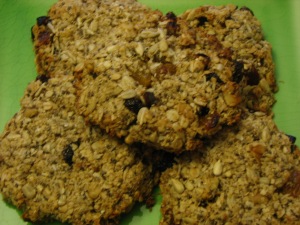 I have experimented with many breakfast bars and “cookies” over the last couple years and was usually disappointed with the results. They were either too bland, had too much sugar or didn’t hold together well. This recipe can be modified quite a bit to include the kinds of nuts, seeds and dried fruits you prefer. I am already thinking of ways to use my favorite dried apples in the next version!
This is one cookie that you don’t have to feel guilty about eating for breakfast!
Makes 8 large cookies
Ingredients
3/4 C Quick cooking oats
3/4 C Oat bran
1/2 C Unsweetened coconut flakes
1 TBS Chia Seeds
1/2 Tsp Cinnamon
1/4 Tsp Salt
1/4 C Walnuts, chopped
1/4 C Sunflower seeds
1/4 C Golden raisins
1/4 C Pitted dates, chopped
1/4 C Unsweetened dried cherries, chopped
2 Very ripe bananas, mashed
1/4 C Coconut oil, melted
1 TBS Honey
1 Tsp Vanilla paste (pure vanilla extract will work as well)
Preheat oven to 350 degrees. Place a silpat on a large baking sheet (you can also line with parchment or rub a small amount of coconut oil directly on the pan to prevent sticking)
In a large bowl, combine all the dried ingredients (oats through salt). Add dried fruit and nuts being sure to stir well so the fruit doesn’t clump together.
Add the mashed banana, coconut oil, honey and vanilla to the bowl and stir well to combine. Use your hands to form eight cookies. Cook for approximately 20 minutes, or until the edges begin to brown slightly. Allow to cool on the cookie sheet.
These cookies freeze very well. Just thaw in the refrigerator overnight or put one in the microwave for approximately 20 seconds to thaw.
Buckwheat and Oat Banana Pancakes
Posted: September 12, 2012 Filed under: breakfast | Tags: banana, breakfast, buckwheat flour, flour, oat flour, whole wheat Leave a comment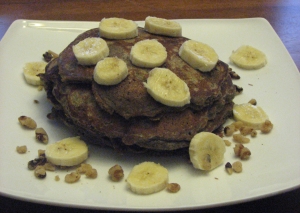 I’ve taken a little hiatus from blogging after making the life changing decision to leave my corporate job FOR GOOD. Thanks to a very supportive husband, I left my marketing job at the end of August and I am now a stay at home mom and part-time student. I am currently studying at the Institute of Integrative Nutrition to become a health coach! My hope is to start a private practice and conduct 6 month health coaching programs in-person or on the phone in the Spring of 2013. Health and wellness has always been a big part of my life and now I am on the path to actually do what I love as a career! If you are interested, check out my business Compass Nutrition on Facebook. My page includes lots of helpful information on healthy living.
I hope to have 2-3 recipes a week to share with you now that I have more time to devote to cooking!
But now back to the subject of these wonderful pancakes! I have been on a quest the last year to try and broaden my daughter’s horizons with breakfasts. I found a couple recipes that I mashed together to create this healthy pancake that is also KID FRIENDLY! To tame down the buckwheat flavor, I also added in whole wheat and oat flour. I like to serve these with more bananas on top, toasted walnuts and a little pure maple syrup.
Makes 8 pancakes
Ingredients
1/4 C Buckwheat flour
1/4 C Whole wheat flour
1/4 C Oat flour
1 TSP Baking powder
1/2 TSP Baking soda
1/4 TSP Cinnamon
Pinch of salt
1 Large ripe banana, chopped into 1/4 in dice
1 TBS honey (raw local honey is best if you can get it)
1 TSP vanilla bean paste
1 C buttermilk
1 Egg
1 TBS Coconut oil, warmed to liquify
Combine dry ingredients (buckwheat flour through salt) in a small bowl. In a medium sized bowl, combine remaining ingredients and stir well to combine. The coconut oil may start to solidify once everything is combined – that’s OK. It will liquify again once it hits the skillet. Add dry ingredients to the wet and stir until combined.
Heat a skillet over medium heat. If using a nonstick skillet you should not need to spray the pan. If you are using a stainless steel pan, you can spray it with cooking spray, or add a tsp of coconut oil to coat the pan to coat and prevent sticking.
Add enough batter to make a roughly 6″ round pancake. It is ready to flip when you start to see bubbles on the surface (about 3 minutes). Flip and cook about 2 minutes more. Repeat with remaining batter.
Top with more banana, toasted almonds and pure maple syrup. YUM!
Sweet and Spicy Stovetop Beans with a Mango and Pineapple Salsa
Posted: August 29, 2012 Filed under: dinner, side dishes | Tags: beans, cilantro, jicama, mango, pineapple 1 Comment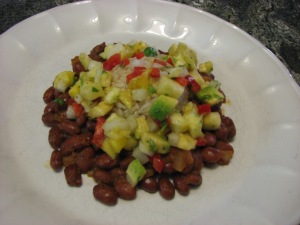 Since I decided to go back to eating vegetarian earlier this summer, I have been on the lookout for new ways to use beans. Not only are they a great source of protein, they are also full of fiber AND they are inexpensive! Even the organic beans that I buy are only $1.79 a can. This recipe was born one night when I got home from picking up my daughter from camp and realized that I was missing some ingredients for the meal I had planned. I always have beans on hand, so I decided to concoct a quick stovetop bean recipe.
The photo doesn’t do this meal justice. I promise you that the combination of spicy and sweet is a party for your mouth. This meal is now on our regular meal rotation and every time I cook it my husband declares “I love this stuff!”. I hope you enjoy it as much as we do!
Serves 4
Ingredients
Stovetop Beans
1 Tsp Olive oil
1 Large onion, small dice
2 Cans of small organic red beans, rinsed
1 TBS Fresh grated ginger
1 Clove of garlic, minced
1/4 Tsp Dried thyme
1/4 C Dry sherry
2 TBS Dijon mustard
1/2 C Organic ketchup
2 Tsp Chipotle peppers in adobo, chopped (you want a mix of both adobo sauce and pepper)
3/4 C Water
Salt and pepper to taste
Salsa
1 Ripe Mango, peeled and cut into 1/2 in dice (If you are unsure how to cut up a mango, click here for simple instructions)
1 Cup Pineapple, cut into 1/2 in dice
1/2 C Jicama (daikon also works nicely), cut into 1/4 dice
1/2 C Red pepper, cut into 1/4 in dice
2 TBS Cilantro, finely chopped
Juice of 1/2 lime
1/4 Tsp Cumin
Dash of Cayenne pepper
Salt and pepper to taste
Saute onion in olive oil on medium heat until translucent. Add garlic and cook for 1 minute. Add remaining ingredients except salt and pepper and simmer, covered over low heat until sauce has thickened, approximately 20 minutes. Season to taste with salt and pepper.
While beans cook, combine all the salsa ingredients together in a bowl. Season to taste with salt and pepper.
Serving suggestion: With a little brown rice on the bottom, tropical salsa and a little diced avocado, it’s a filling and best of all HEALTHY dinner!
Cold Peanut Noodles with Crunchy Vegetables
Posted: August 13, 2012 Filed under: dinner, pasta, veggies | Tags: cabbage, carrots, ginger, peanut butter, red bell pepper, scallions, soba noodles Leave a comment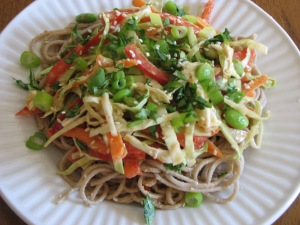 I’ve tried at least a dozen recipes for peanut noodles over the years. I absolutely adore the combination of peanut butter, soy, ginger and chili mixed with noodles and crunchy vegetables. After many tries in my kitchen to find the perfect sauce and variety of vegetables, I think that this a keeper. It’s like a rainbow on the plate and quite pretty to look at (we do eat with our eyes first after all!).
This is a great summertime meal and tastes even better the second day once all the flavors marry overnight (you just may need to add a tiny bit of water to thin the sauce back out). Even my husband who says he doesn’t like peanut noodles is a fan of this dish.
Tip: I always found that mixing all the vegetables and noodles together just didn’t work because all of the veggies fell to the bottom of the bowl and you had to fish around to make sure you got enough. So instead of mixing everything together in one bowl, mix them separately and add the veggies to the top of everyone’s plate after you portion out the pasta.
Serves 6
Ingredients
Sauce
1/3 C peanut butter (you want something with no sugar added- I prefer organic)
1/4 C Rice vinegar
3 TBS Tamari (or low sodium soy sauce)
2 tsp Ginger, minced or grated on a microplane
1 tsp Hoisin
1 1/2 TBS sweet chili sauce
1 tsp Sesame oil
3 TBS Water
Noodle salad
8 oz Soba noodles (I like Yam soba, but you can use whatever you’d like)
1 C cabbage, thinly sliced (you can use red, green or Nappa)
3 Large carrots, cut into matchsticks
1 Large red bell pepper, thinly sliced
5 oz Edamame, cooked and cooled
1/2 C Cilantro, chopped
1/4 C scallions, thinly sliced
2 TBS Sesame seeds
Mix all the sauce ingredients together in a small bowl. Set aside. Mix the cabbage, carrots, bell pepper, edamame and cilantro in a medium size bowl and set aside. Cook the noodles according to the package directions. Rinse with cold water, drain and add to a medium size bowl. Add half of the dressing to the noodles and half to the veggies. tossing each to coat. If the sauce seems too thick, you can add another TBS of water. Portion out the noodles among six salad plates and then divide the veggie mixture over the top. Sprinkle with scallions and toasted sesame seeds.
Quinoa Biriyani with a Date Yogurt Sauce
Posted: August 5, 2012 Filed under: dinner, side dishes | Tags: carrots, cashews, dates, pead, peas, quinoa, yogurt Leave a commentAs I mentioned in an earlier post, I am a huge fan of Indian food. Biriyani is no exception. In an effort to make one of my favorite grain dishes healthier, I decided to experiment with replacing the white rice with quinoa. This is a great dish that can be eaten as a complete meal, or served as a side. The date sauce is a great addition to the dish because it adds a sweet, but not overpowering flavor with a touch of mint. If you don’t like mint, you can simply leave it out.
Quinoa is often served warm, but I prefer it cold or room temp. This is a great dish to bring to a pot-luck dinner and tastes just as good the next day.
If you aren’t very familiar with quinoa, it is a grain-like seed that has a slightly nutty flavor and is a great alternative to white rice or couscous. It’s a complete protein and is high in magnesium and iron as well as being a good source of fiber. In addition, quinoa is a gluten-free food, making it a great option for people with Celiac disease or gluten intolerance.
Tip: Quinoa can sometimes taste bitter when cooked. Soak the seeds in cold water for 15 minutes before cooking and you can help minimize the bitterness.
Quinoa Biriyani with a Date Yogurt Sauce
Serves 4 as a main dish and 6 as a side dish
Ingredients
3/4 C Quinoa, (see tip above)
1/2 C Vegetable Broth
1/2 C Water
1/2 C Carrots, shredded
1/3 C Raisins
2 tsp Curry paste mixed with 1 tsp water
1/4 C Unsweetened shredded coconut
1/2 Peas (cooked and cooled)
1/3 C Cashews (I like to toast mine for a few minutes in a dry pan)
2 TBS Cilantro, chopped
2 T scallions, sliced into 1/8″ rings (green part only)
Sauce
2 Pitted dates
1/4 C Plain lowfat Greek yogurt (Fage is my favorite)
1 tsp lemon
4 mint leaves, finely chopped
Add Quinoa, vegetable stock and water to a small saucepan over medium-high heat. Once the quinoa boils, turn the stove down and simmer for 20-25 minutes or until cooked ( you can tell that quinoa is done when you see a small white “ring” around the outside the seeds). While the quinoa is cooking, add the carrots through the scallions into a large bowl and stir to combine.
Next, prepare the sauce by adding the dates, yogurt, lemon and mint leaves into a food processor or blender until thoroughly combined. It won’t be completely smooth, but shouldn’t have large chunks of dates.
When the quinoa is done cooking, add it to another bowl and allow to cool completely before adding to the carrot, raisin, pea mixture.
To serve, add roughly a TBS of the sauce on top of the biriyani.
Baba Ganouj and Whole Wheat Pita Bread
Posted: July 19, 2012 Filed under: appetizer, dinner, side dishes, snacks | Tags: eggplant, pita bread, tahini, whole wheat flour 3 Comments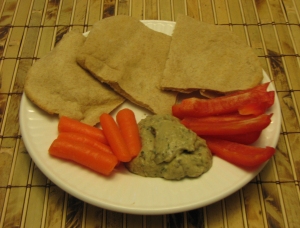 As much as I LOVE homemade sandwich bread, I rarely delve into making my own. I usually stick with quick breads like strawberry, banana or blueberry lemon.
I decided to go outside my comfort zone two weeks ago and try my hand at homemade pita. I knew I wanted to use whole wheat flour so I found a recipe on Epicurious that I thought I could modify easily enough with a higher ratio of whole wheat flour. This recipe does take time, but I assure you it’s worth the effort! Since I was working with my little chef (my 4 year old daughter) it was fun to teach her about yeast and the whole process of how to make bread. The end result was fabulous tasting pita, but it lacked the “pocket”.
I went back to the drawing board, modified the recipe again, and came up with this! It’s the perfect thickness and puffs up beautifully as it cooks to form that pocket I was missing from the first try. The key is to roll it thin enough and don’t overcook. It literally takes 3 minutes in the oven!
To go with these lovely pita, I made up a batch of baba ganouj. This heavenly eggplant spread not only goes great with the pita, it’s can also be served with crudites, crackers or spread on some multigrain bread and layered with some grilled veggies. YUM!
Whole Wheat Pita
Makes 8 (7″ inch) pitas
Ingredients
1 package active dry yeast
1 tsp honey
1 1/4 C warm water (105-115 degrees F)
1 1/2 C whole wheat flour
1 C oat flour
3 T vital wheat gluten (this really helps to make the pita rise)
1/2 C bread flour (plus more for kneading and rolling out)
1/4 C extra virgin olive oil
1 tsp salt
Stir together yeast, honey, and 1/2 cup warm water in a large bowl, then let stand until foamy, about 5 minutes.
Next, stir together the flours in another bowl. Once the yeast mixture is ready, whisk 1/2 cup flour mixture in until smooth, then cover with plastic wrap and let it sit in a warm place until doubled in bulk and bubbly, about 45 minutes.
Stir in oil, salt, remaining 3/4 cup warm water, and remaining 2 1/2 cups flour mixture until a dough forms.
Turn out dough onto a floured surface and knead, working in just enough additional flour to keep dough from sticking, until dough is smooth and elastic, 8 to 10 minutes. Form dough into a ball and put in an oiled large bowl, turning to coat. Cover bowl with plastic wrap and let dough rise again in a warm place until doubled in bulk, about 1 hour.
Punch down dough and cut into 8 pieces. Form each piece into a ball. Flatten 1 ball, then roll out into a 7-inch round on floured surface with a floured rolling pin.
Set oven rack in the lower third of the oven and place a large piece of aluminum foil directly across the rack. Preheat oven to 500 degrees.
Place pitas (you should be able to fit four pitas across) directly onto the aluminum foil making sure they aren’t touching. Bake for 2 minutes. Flip and bake for 1 minute more. DO NOT OVERCOOK! They really do only take 3 minutes!
Cool on a wire rack before storing. I wrap them individually in plastic wrap once they are cool, place in a large freezer bag and put them in the freezer until I am ready to eat one. You can defrost them overnight in the refrigerator or pop in the microwave for 2o seconds.
Baba Ganouj
Serves 6-8
2 medium eggplant
Juice from one lemon (you want a good 2 TBS worth)
1/2 C tahini
1/3 C finely chopped parsley (I prefer flat leaf over curly)
1 tsp salt
1/4 tsp garlic powder (you could use 2 minced garlic cloves if you prefer fresh)
1 TBS olive oil
Fresh cracked black pepper to taste
Preheat oven to 400 degrees.
Prick the eggplant all over with a fork and place on a cookie sheet lined with aluminum foil. Cook for roughly 45 minutes or until they look deflated and are completely soft. Once they are cool enough to handle, scoop out the flesh into a bowl and mash well. Add remaining ingredients and stir well to combine. Chill until cold. Enjoy!
Apple Cheddar Pizza
Posted: July 12, 2012 Filed under: dessert, dinner, pizza | Tags: apple, apricot, cheddar, pizza Leave a comment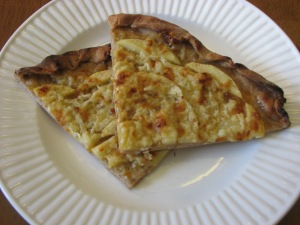 I LOVE Molly Katzen. She’s probably my all time favorite vegetarian cookbook author. I was flipping through Vegetable Heaven the other day and came across this recipe. OK…I will be honest and say that technically this is categorized under desserts, but we had it for dinner with a big salad and it was a HUGE hit. I don’t think it’s overly sweet, especially with tart apples. I made a few small modifications, but overall stayed true to her recipe. I chose to use whole wheat crust instead of Boboli because I prefer a thin and crispy crust. You can make your own, but it’s also available at most grocery stores. the wheat crust works really well with the other ingredients. I only wish my picture did this tasty recipe justice (I am working on my photography skills slowly but surely!)
Serves 4 (two small pizzas)
Ingredients
Whole wheat pizza crust (I bought mine in the deli section of my grocery store)
1 C cheddar cheese, grated
3-4 Granny Smith or other tart apples, peeled and thinly sliced
3 TBS apricot jam
Salt and pepper to taste
1 TBS olive oil (optional)
Flour (for dusting counter)
Cornmeal (for dusting pizza peel)
Preheat oven to 450 degrees
Divide dough into two pieces. Set one aside. Sprinkle some cornmeal on a pizza peel (this will keep the dough from sticking when you transfer it to the oven). If you don’t have a pizza peel, just sprinkle the cornmeal directly onto a cookie sheet instead.
Lightly dust you counter with flour and roll the dough out to roughly a 10″ round (it should be about 1/8″ thick). Transfer to a pizza peel if you will be cooking on a pizza stone (my preferred cooking method). Fold over edges to form a rustic crust. Cover bottom (except the crust) with half of the apricot preserves. Follow with the apple slices being sure to cover as much of the bottom as possible. Finish off with half of the cheddar cheese. Sprinkle with salt and pepper to taste. Brush crust with olive oil. Repeat with second pizza. Slide pizza off peel onto the pizza stone and cook for 9 minutes or until the crust is golden brown, turning halfway through cooking time. Cut each pizza into four pieces.

